
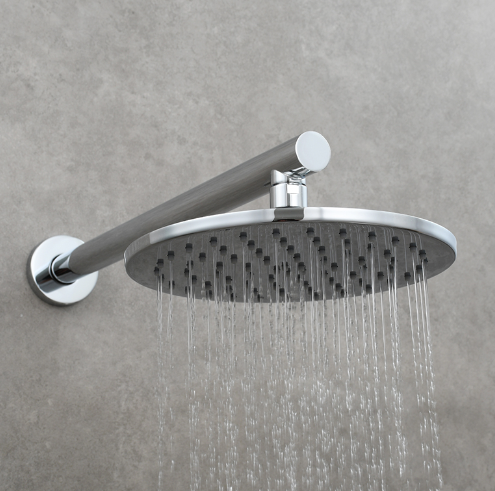
When it comes to bathroom fixtures, few components are as quietly important as fixed shower arms. These seemingly simple metal extensions carry the full weight of a showerhead, endure constant exposure to water, steam, and cleaning chemicals, and must hold their position reliably for years. Yet many homeowners and contractors overlook the installation process, assuming it is straightforward enough to rush through. The truth is that how a fixed shower arm is installed has a direct and significant impact on how long it will last, how well it performs, and whether it will need costly repairs or replacements down the line.
Understanding the right installation techniques is essential whether you are upgrading a residential bathroom, outfitting a hotel en-suite, or completing a commercial renovation project. Fixed shower arms that are properly installed resist rust, leaks, and loosening far better than those rushed into place without preparation. This guide walks through the most important installation tips that genuinely improve the long-term durability of fixed shower arms, covering everything from wall preparation to thread sealing to final torque control.

Wall Preparation and Structural Integrity
Assessing the Wall Before Mounting
Before any fixed shower arm goes into the wall, the mounting surface must be carefully evaluated. Tiles, drywall, and cement board all have different load-bearing capabilities, and choosing an anchor point that lacks sufficient structural strength is one of the most common causes of fixture failure. The elbow fitting inside the wall needs to be secured to either a stud or a dedicated blocking piece installed between studs specifically to support the arm.
If the backing is inadequate, the constant leverage created by the weight of the showerhead and the pressure of daily use will gradually work the fitting loose. This loosening creates micro-movements at the joint, which cause thread wear, micro-cracks in the surrounding wall material, and eventually water infiltration behind the tile. Taking extra time at this stage is not optional — it is the foundation of durability for fixed shower arms.
Use a stud finder or probe the wall carefully to identify exactly where solid backing exists. If blocking needs to be added, do it before the wall surface is finished. A properly backed installation point dramatically reduces vibration stress every time the shower is used, which extends the service life of fixed shower arms considerably.
Ensuring a Clean and Level Entry Point
The hole through which the fixed shower arm passes must be properly sized and clean. An oversized hole allows lateral movement, which stresses the threads and the surrounding seal over time. A hole that is too tight can crack tiles or wall material during installation and create stress concentrations that worsen with thermal expansion and contraction cycles.
Levelness also matters more than most people expect. A fixed shower arm that is installed at an angle places uneven stress on the elbow fitting inside the wall, and over years of use that uneven stress accelerates wear. Use a spirit level during the installation to confirm the arm exits the wall at the correct angle relative to the floor and the adjacent surfaces. Even a few degrees of misalignment can noticeably shorten the life of both the arm and the internal fitting.
Thread Sealing Techniques That Prevent Leaks and Corrosion
Choosing the Right Sealant Material
Thread sealing is one of the most critical steps in any fixed shower arm installation, and it is also one of the most frequently done incorrectly. The goal of thread sealing is to create a watertight bond that prevents moisture from penetrating the joint while still allowing the connection to be made up firmly. Two main options exist: PTFE tape (commonly called plumber's tape) and pipe thread compound (also known as pipe dope).
For most residential and commercial fixed shower arm installations, high-quality PTFE tape is the preferred choice because it is clean, easy to apply, compatible with chrome-plated and metal threads, and does not harden in a way that makes future removal difficult. Pipe dope can also be used but should be selected carefully to ensure it is compatible with chrome-plated surfaces and will not cause corrosion or staining over time.
Whichever sealant you use, avoid under-applying it. Many durability problems with fixed shower arms trace back to inadequate thread sealing that allowed water to wick into the joint, initiating corrosion and eventually causing persistent drips or fitting degradation.
Applying PTFE Tape Correctly for Maximum Sealing Effectiveness
Proper PTFE tape application is a skill that makes a measurable difference in how long fixed shower arms remain leak-free. The tape should be wound in the same direction as the thread, meaning clockwise when viewed from the end of the arm that will be inserted into the fitting. This ensures the tape wraps tighter as the arm is screwed in rather than bunching up or peeling away.
Apply a minimum of three to four full wraps of tape, stretching it slightly as you go so it conforms closely to the thread profile. On larger diameter threads typical of fixed shower arms, five or six wraps may provide better protection. After wrapping, press the tape firmly against the threads with your fingers to seat it properly before making up the joint.
Avoid the common mistake of wrapping tape over already-corroded or damaged threads. If the threads on the internal elbow or on the fixed shower arm itself are degraded, the tape cannot create an effective seal. Inspect threads carefully before applying any sealant, and replace components with damaged threads rather than trying to compensate with extra tape.
Torque Control and Tightening Best Practices
Understanding the Risk of Over-Tightening
One of the most counterintuitive aspects of installing fixed shower arms is that tighter does not always mean better. Over-tightening is a genuine and common problem that leads to cracked fittings, stripped threads, and damaged chrome plating. When excessive torque is applied, particularly with metal-to-metal threaded connections, the stress concentrations created can cause microscopic fractures in the fitting that worsen every time the shower is used.
Chrome-plated fixed shower arms are especially susceptible to surface damage from over-tightening when tools make direct contact with the finished surface. Scratches in the chrome plating are not merely cosmetic — they expose the underlying metal to moisture, which initiates rust and shortens the service life of the arm significantly. Always protect the surface with a cloth or rubber-padded tool when applying any wrench or pliers.
The correct approach is to tighten fixed shower arms firmly by hand first, then use a wrench to advance one to two additional turns beyond hand-tight, pausing to check alignment and confirm there are no leaks once water is turned on. This approach provides adequate sealing force without overstressing the connection.
Maintaining Correct Orientation During Tightening
Fixed shower arms must be oriented correctly when fully tightened, and this requires planning ahead during the installation. Because the arm screws in progressively, the final position it reaches when properly tightened may not align with where the showerhead needs to point. Experienced installers account for this by estimating how many thread turns the arm will advance during tightening and starting the insertion at an angle that will result in correct final orientation.
Never back off a threaded connection to improve orientation after it has been tightened. Backing off a threaded joint breaks the seal formed by the PTFE tape and creates a path for water intrusion. If orientation is incorrect after tightening, the proper solution is to unscrew the arm fully, reapply sealant, and reinstall with adjusted starting angle rather than simply reversing the arm slightly.
Post-Installation Checks That Protect Long-Term Durability
Testing for Leaks Immediately After Installation
Once fixed shower arms are installed and the showerhead is attached, a thorough leak check is essential before closing up any wall access panels or completing surrounding finishes. Turn the water supply on slowly and inspect every threaded joint and connection point carefully. Look not just for active drips but also for any moisture or discoloration that suggests slow seeping at a joint.
Pay particular attention to the joint where the fixed shower arm enters the wall, as this is the connection most hidden from view during normal use. A slow leak at this point may not become visible for months, by which time it may have caused significant water damage to the wall structure behind the tile. Early detection and correction is far less disruptive and expensive than remediation after damage has occurred.
If a leak is detected, do not attempt to stop it simply by tightening further. Turn off the water, drain the line, and properly reseal the joint using fresh PTFE tape applied correctly before reassembling. Fixed shower arms that are installed with this level of care will provide years of reliable, leak-free performance.
Routine Maintenance Practices That Extend Arm Lifespan
Even the best-installed fixed shower arms benefit from periodic maintenance that prevents the gradual buildup of mineral deposits, limescale, and surface corrosion. Hard water is particularly damaging to chrome-plated surfaces, as mineral deposits trap moisture against the metal and create pitting over time if left unaddressed.
Clean fixed shower arms regularly using mild, non-abrasive cleaners. Avoid harsh chemical descalers that can strip chrome plating or degrade sealant materials at the thread joints. A simple wipe-down after each shower to remove water droplets can significantly slow the rate of mineral buildup and keep the surface looking and performing at its best.
Inspect the connection points of fixed shower arms at least once a year. Check for any signs of staining around the wall entry point, which may indicate a slow leak, and verify that the arm has not worked loose from vibration or use. Early intervention on any developing issue is always the most cost-effective approach to maintaining durable fixed shower arms.
Material Considerations That Affect Durability
Why Metal Construction Matters for Fixed Shower Arms
The material from which fixed shower arms are made plays a significant role in determining how well they respond to proper installation and how long they maintain their integrity. Metal construction — particularly solid brass or high-grade zinc alloy with chrome plating — provides dimensional stability, strong thread engagement, and resistance to the constant temperature cycling that shower environments create.
Fixed shower arms made from lower-quality plastics or thin-walled metals are more prone to flexing under load, which stresses thread seals and can cause micro-cracks in surrounding tiles or fittings over time. When selecting fixed shower arms for any installation where durability is a priority, verifying that the arm body and threads are made from substantial metal ensures the installation techniques described throughout this guide will deliver their full benefit.
Chrome plating quality also matters significantly. A thick, properly applied chrome finish provides a protective barrier against moisture penetration and corrosion. Thin or poorly applied plating will begin to fail relatively quickly in the humid shower environment, exposing the base metal and initiating rust regardless of how well the arm was installed. Always verify the plating quality of fixed shower arms before committing to an installation.
Compatibility Between Arm and Fitting Materials
Galvanic corrosion is a real risk when dissimilar metals are placed in contact in a wet environment. Fixed shower arms that are made from one metal alloy screwed into a fitting made from a significantly different alloy can experience accelerated corrosion at the joint, degrading thread surfaces and leading to joint failure much earlier than expected.
When replacing fixed shower arms in an existing installation, confirm that the material of the new arm is compatible with the material of the existing wall fitting. In new installations, specifying compatible materials throughout the assembly from the start eliminates this risk entirely and contributes to the long-term reliability of the installation as a whole.
FAQ
How many times should PTFE tape be wrapped around fixed shower arm threads?
For most fixed shower arm installations, three to six wraps of PTFE tape applied in the direction of the thread is appropriate. Fewer wraps may not provide sufficient sealing, while excessive wrapping can make it difficult to achieve proper thread engagement. Always wrap in the clockwise direction when viewed from the insertion end, and press the tape firmly against the threads before installing.
Can fixed shower arms be installed without a wrench?
Hand-tightening alone is generally not sufficient to create a durable, leak-free installation of fixed shower arms. After achieving hand-tight, use a wrench or adjustable pliers to advance the arm one to two additional turns. Always protect the chrome surface with a cloth or rubber-padded tool to prevent scratching, which can initiate corrosion and shorten the arm's service life.
What causes fixed shower arms to become loose over time?
Fixed shower arms most commonly loosen due to inadequate backing in the wall, insufficient thread sealing that allows micro-movement, or thermal expansion and contraction cycles that gradually work the joint loose. Ensuring solid structural backing at installation, applying thread sealant correctly, and checking connections annually can prevent this problem effectively.
How often should fixed shower arms be inspected for maintenance?
A visual inspection of fixed shower arms at least once per year is recommended as standard maintenance practice. Check for any staining around the wall entry point, signs of corrosion on the arm surface, or any loosening at the connections. Addressing minor issues early prevents them from developing into significant leaks or structural damage that requires more extensive and costly repairs.
