
 EN
EN
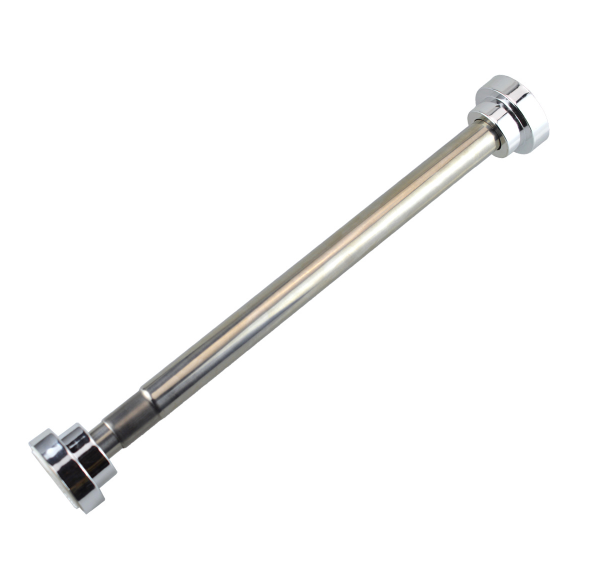
When it comes to bathroom upgrades, few decisions feel as deceptively simple yet practically complex as choosing how to mount your shower rod. versatile shower rods have become a go-to solution for homeowners and renters alike, offering the flexibility to work across different wall materials, bathroom layouts, and installation preferences. But understanding exactly which mounting options are available—and which one suits your specific wall type—is essential before you make a purchase or begin any installation work.
Tile walls and drywall each present their own set of challenges. Tile is hard, prone to cracking under improper drilling, and requires precision tools. Drywall is softer but often lacks the structural anchoring needed to support fixtures under daily use. Versatile shower rods are specifically engineered to address both scenarios, offering mounting solutions that range from tension-based and adhesive systems to traditional drill-mounted brackets. Understanding these distinctions helps you protect your walls while achieving a secure, long-lasting installation that looks clean and performs reliably.
Understanding Wall Types Before Choosing a Mounting Method
The Properties of Tiled Bathroom Walls
Tiled walls are among the most common surfaces found in showers and wet areas. Ceramic and porcelain tiles are dense, water-resistant, and durable, but they are also brittle when subjected to concentrated force. Drilling directly into tile without the right bit or technique can result in cracked tiles, damaged grout lines, or compromised waterproofing—all of which are costly to repair. This is why many homeowners specifically seek out versatile shower rods that can be mounted without drilling into the tile surface at all.
Behind the tile layer, there is typically a cement board or moisture-resistant substrate. When drill mounting is chosen for tile walls, the anchor must penetrate through the tile and into this backing layer to provide the structural support needed. This requires diamond-tipped drill bits and a steady hand. Versatile shower rods designed for tile installation often come with specialized anchors, washers, and sealing materials to ensure the mount is waterproof at the entry point.
Another consideration with tiled walls is grout placement. Ideally, drill points should fall on the tile face rather than the grout line, as grout is more porous and less structurally reliable. Versatile shower rods with adjustable bracket positions make it easier to find a solid tile center for the mount, reducing the risk of cracking or weak hold points.
The Properties of Drywall in Bathroom Environments
Drywall is the most common wall material in residential construction, but standard drywall is not suitable for direct exposure to water. In bathrooms, moisture-resistant drywall—often called greenboard or cement board—is used instead. However, even moisture-resistant drywall has limitations when it comes to supporting hardware under repeated load and vibration. Versatile shower rods installed on drywall must be anchored into wall studs or use heavy-duty drywall anchors to avoid pull-out failure over time.
When wall studs are accessible behind the drywall, they provide an ideal anchor point for drill-mounted brackets. Studs are typically spaced 16 inches apart, and if your mounting points align with stud positions, you can achieve a very solid installation. If studs are not positioned where you need them, toggle bolts or molly anchors can distribute the load across a wider drywall area, though this method is generally less robust than stud anchoring for versatile shower rods.
For renters or those in bathrooms where wall modification is not permitted, adhesive or tension-based mounting options for versatile shower rods become particularly valuable on drywall. These methods avoid structural penetration entirely, making them reversible and damage-free while still providing functional support for a shower curtain or handheld shower setup.
Drill-Mounted Bracket Systems for Permanent Installation
Standard Screw-and-Anchor Bracket Mounting
The most traditional method for installing versatile shower rods involves wall-mounted brackets secured with screws and wall anchors. This method works on both tile and drywall and provides the most structurally sound connection. The bracket is positioned at the desired height, a pilot hole is drilled through the wall surface, an anchor is inserted, and the bracket is screwed firmly in place. The result is a rigid, stable mount capable of supporting both the rod and any accessories attached to it.
On tile, this process requires a carbide or diamond-tipped drill bit to penetrate the hard ceramic surface without cracking it. Applying light, consistent pressure with low drill speed—and keeping the surface cool with water or tape as a buffer—is essential. Versatile shower rods with wider bracket flanges help distribute the load over a larger surface area, reducing stress concentration on any single anchor point and minimizing the risk of tile damage over time.
For drywall, this method is most secure when screws reach into studs behind the wall. If studs are not available at the bracket location, using toggle anchors rated for bathroom use ensures the load is distributed adequately. Always follow the manufacturer's load guidelines for the anchors you select when mounting versatile shower rods, especially if the rod will also support a handheld shower head or heavy curtain rings.
Flanged Wall Bracket Mounting with Silicone Sealing
In wet zones where tile meets the shower area, flanged brackets are a preferred solution for mounting versatile shower rods. These brackets have a wide decorative base that covers the drill holes and sits flush against the wall. The flange not only adds visual polish but also allows for silicone sealing around the bracket perimeter to prevent moisture intrusion through the drill holes.
Silicone sealing is especially important when mounting into tile on shower walls where water exposure is direct and continuous. Without proper sealing, water can seep behind the tile through drill holes, causing mold growth, adhesive failure, or water damage to the substrate. Versatile shower rods that include flanged brackets and waterproof silicone in their installation kit offer a more complete and long-term mounting solution for tile environments.
On drywall surfaces outside the direct spray zone, flanged brackets still offer improved aesthetics and a cleaner finish. They also make re-installation or repositioning easier, as the wide base can cover any minor surface irregularities or patch work if the rod is ever relocated. This makes flanged bracket systems one of the most practical choices for versatile shower rods in finished bathrooms.
No-Drill and Tension-Based Mounting Options
Tension Rod Mechanisms for Tool-Free Installation
Tension rods are among the most popular mounting options for versatile shower rods, primarily because they require no drilling, no hardware, and no permanent modification to any wall surface. A tension rod uses internal spring pressure or a threaded adjustment mechanism to press against two opposing walls, holding itself in place through friction alone. This makes it immediately practical for renters, temporary installations, or bathrooms where drilling is simply not preferred.
While tension rods work best between two parallel walls, some versatile shower rods are designed as curved tension systems that can follow the contour of a bathtub or shower stall. The ends are fitted with rubber or silicone end caps that grip the wall surface without scratching it, and on both tile and smooth-finished drywall, these caps create enough friction to hold the rod reliably under normal curtain weight and usage.
One practical consideration with tension rod systems is that they can slip over time if they are not checked and tightened periodically. On very smooth tile surfaces, slip resistance is lower than on textured or matte finishes. For this reason, some versatile shower rods come with additional rubber grip inserts or wider end plates to improve contact area and reduce the chance of the rod dropping unexpectedly. Tension systems are ideal for lightweight curtain and rod combinations but may not be suitable for configurations that include heavier accessories.
Adhesive Mounting Solutions for Tile and Painted Drywall
High-strength adhesive mounting has improved significantly in recent years, and many modern versatile shower rods now incorporate adhesive bracket systems that can hold firmly on both tile and painted drywall. These systems typically use industrial-grade adhesive pads or nano-suction technology, which create a powerful bond without any mechanical fastening. Some designs allow the adhesive bracket to be removed and reattached when needed, making them surprisingly flexible for a no-damage solution.
The key to successful adhesive mounting is proper surface preparation. The wall must be clean, dry, and free of soap residue, oils, or dust before the adhesive pad is applied. On tile, a smooth glazed surface provides an ideal bonding substrate. On drywall, the paint layer must be well-adhered and free of peeling, as adhesive strength depends entirely on the bond between the pad and the surface underneath. Versatile shower rods with adhesive mounts typically specify the maximum weight load and surface types they are rated for, and these guidelines should be followed carefully.
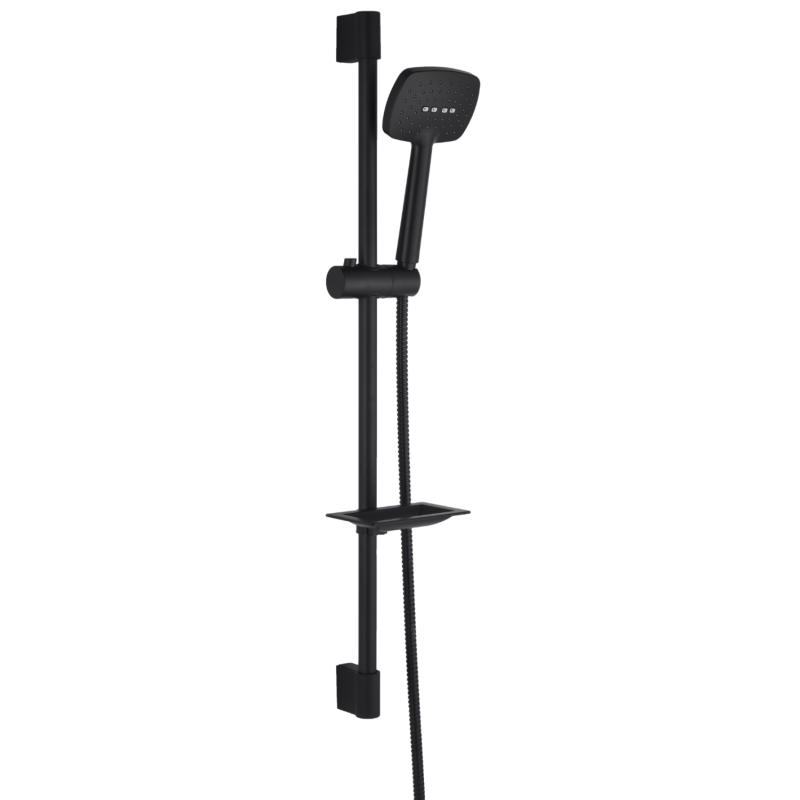
It is worth noting that adhesive systems are generally best suited for rod holders, bracket rings, or slide bar mounts used for handheld shower heads rather than for traditional tension-length shower curtain rods. For handheld shower slide bars in particular, adhesive mounting on tile offers a clean, drill-free installation that works extremely well and is becoming the standard expectation in easy-install versatile shower rods designed for modern bathrooms.
Ceiling-Mounted and Freestanding Rod Configurations
Ceiling Drop Rods for Open Shower Layouts
In open-plan bathrooms or walk-in shower areas without traditional wall enclosures, ceiling-mounted configurations provide a dramatic and functional alternative. These systems suspend versatile shower rods from ceiling brackets, allowing curtains or privacy panels to hang down around the shower area. The ceiling mount is anchored into ceiling joists, which are typically solid wood and provide excellent load-bearing capability.
Ceiling-mounted rods are particularly effective in bathrooms with high ceilings, wet rooms, or custom shower builds where wall mounting is not practical. They create a clean, architectural look and give the bathroom a more open, hotel-like feel. Versatile shower rods in ceiling-drop configurations are often made of stainless steel or aluminum to resist the moisture present in high-humidity environments, and they accommodate straight, curved, or custom bent rod profiles depending on the shower shape.
Installation of ceiling-mounted systems requires precise location of ceiling joists, which run perpendicular to the main structural direction of the roof or floor above. Using a stud finder to locate joists before drilling ensures the anchors hit solid material rather than the hollow cavity between joists. Ceiling mounting is not suitable for tile ceilings without professional assistance, as the same cracking risks apply to overhead tile surfaces as they do to wall tile.
Freestanding Rod Frames for No-Wall-Contact Installations
For situations where neither wall contact nor ceiling mounting is desirable, freestanding rod frames offer a completely independent mounting solution. These frames consist of a floor-to-ceiling or self-balanced post system that holds the shower rod at the correct height without any connection to the surrounding walls. Versatile shower rods mounted in freestanding frames are ideal for claw-foot tub setups, vintage-style bathrooms, or temporary installations in rental properties.
Freestanding systems come in various configurations—some rest on the floor and press against the ceiling using spring tension, while others use weighted bases that sit directly on the tub rim or bathroom floor. These systems require no drilling into walls or tile, making them completely damage-free and fully portable. They can be moved, adjusted, or removed without leaving any trace on the walls, floors, or ceiling.
While freestanding systems are not as rigid as wall-mounted alternatives, modern designs for versatile shower rods in freestanding frames have improved substantially in terms of stability. Wider base footprints, anti-slip feet, and reinforced joints reduce wobble and improve safety. They remain a practical choice when wall conditions—such as crumbling grout, hollow tile, or compromised drywall—make permanent mounting inadvisable.
Choosing the Right Mounting Option for Your Bathroom
Matching the Mounting Method to Your Wall Condition
Selecting the right mounting approach for versatile shower rods always begins with an honest assessment of your wall condition. Fresh tile in good repair, with solid substrate behind it, is an ideal candidate for either drill-mounted brackets with proper sealing or adhesive systems on smooth tile surfaces. Older tile with existing cracks, loose grout, or hollow-sounding sections should be handled with care—drilling into compromised tile risks propagating existing damage, and adhesive may not bond reliably to a surface that is no longer fully stable.
Drywall condition matters equally. New, well-primed, and painted drywall can support both adhesive and drill-mounted solutions, but drywall that shows signs of moisture damage, soft spots, or paint peeling will not anchor hardware reliably. In these situations, addressing the underlying wall condition before installing versatile shower rods is always the more practical long-term decision, even if it requires more initial effort.
Weight is another critical variable. A simple curtain rod with a lightweight fabric curtain places very little demand on the mounting system. But versatile shower rods that are also designed to carry a slide bar for a handheld shower head, multiple curtain rings, or accessories like caddies add cumulative weight and dynamic load. Always check the rated load capacity of any mounting method against the total expected weight of the rod, curtain, and all attached items before committing to a specific installation approach.
Practical Tips for Long-Term Mounting Reliability
Regardless of the mounting type chosen, long-term reliability of versatile shower rods depends heavily on installation quality. For drill-mounted systems, using stainless steel or corrosion-resistant screws is essential in wet environments, as standard carbon steel fasteners will rust and lose holding strength over time. All holes drilled into tile should be sealed with waterproof silicone before and after bracket installation to prevent moisture infiltration.
For adhesive-based systems, following the curing time specified by the adhesive manufacturer is critical. Many users make the mistake of testing the mount immediately after installation, before the adhesive has fully bonded. Allowing 24 to 48 hours of cure time before placing any load on the bracket ensures the adhesive reaches its full rated strength and extends the life of the mount considerably.
Routine maintenance checks—such as inspecting brackets for looseness, checking adhesive edge sealing for lifting, and verifying that tension rod ends remain firmly pressed against wall surfaces—help catch potential failure points early. Versatile shower rods are designed to be easy to use every day, and a small amount of periodic attention to the mounting hardware ensures they continue to perform safely and reliably throughout their service life.
FAQ
Can versatile shower rods be mounted on ceramic tile without cracking it?
Yes, versatile shower rods can be mounted on ceramic tile without cracking it, but only when the correct tools and techniques are used. A diamond-tipped or carbide drill bit should be used at low speed with light pressure to penetrate the tile surface cleanly. Applying tape over the drill point reduces vibration-induced cracking. Adhesive mounting systems are an even safer option, as they avoid drilling entirely and work well on smooth, glazed ceramic tile surfaces when properly prepared and cured.
Is adhesive mounting strong enough for a full shower rod installation?
Adhesive mounting is suitable for specific applications of versatile shower rods, particularly for slide bars, bracket holders, and lightweight curtain rod end supports. Modern industrial adhesive pads can hold impressive loads when applied to clean, smooth surfaces like tile. However, for heavier configurations involving multiple accessories or dynamic loads, drill-mounted brackets are generally more reliable over the long term. Always check the rated weight capacity of adhesive mounting components against your specific installation requirements before relying on them exclusively.
What is the best mounting method for renters who cannot drill into walls?
Renters seeking damage-free installation of versatile shower rods have two primary options: tension rod systems and high-strength adhesive mounts. Tension rods require no hardware and leave no marks on tile or drywall surfaces. Adhesive bracket mounts, when properly selected and removed with care, can also be damage-free on tile surfaces. Freestanding rod frames are another excellent option for renters, as they require no wall contact at all and can be moved out entirely when tenancy ends.
How do I know if my drywall can support a drill-mounted shower rod bracket?
The most reliable way to determine if your drywall can support a drill-mounted installation of versatile shower rods is to locate the wall studs using a stud finder. Brackets anchored into studs can easily support typical shower rod loads. If studs are not available at the desired mounting location, use toggle anchors rated for bathroom use and verify the weight capacity of the anchors against your expected load. Avoid mounting into drywall areas that show signs of moisture damage, softness, or visible deterioration, as these conditions significantly reduce holding strength.